

Remember when stadiums were just simple concrete bowls? Now, they’re like birds in flight, thanks to designs like the “Colossus” project. This is biomimicry, our starting point.
We’re exploring a world where artificial intelligence doesn’t just help design—it creates it. This is generative design. AI looks at thousands of options to make parts that are both lighter and stronger.
The sporting goods industry is changing fast. It needs smarter, quicker ways to create. From huge Olympic structures to the shoes on your feet, AI is the key.
Imagine gear that’s as light as an empty ego and as strong as a cyclist’s legs. This journey from a simple idea to a real product is where topology optimization excels. It turns digital ideas into high-performance sports equipment.
Framing objectives: stiffness, swing weight, aero, cost
Before starting, the smartest thing is to decide what you want to optimize. You can’t just ask for a “better” part. That’s like asking a chef for “good food” without knowing what you want.
So, we set clear goals. In sports gear, four main goals are important:
- Stiffness: It’s about controlled energy transfer. A weak tennis racket or a shaky bike frame is a problem.
- Swing Weight: It’s about the feel. It’s not just about weight, but how it’s distributed. A balanced foil is better than a clumsy crowbar.
- Aerodynamics: It’s about beating the air. In sports like cycling and swimming, fighting air is key.
- Cost: It’s always a factor. It watches every gram of material and every curve, ready to say no.
Stiffness is key. As tools like Altair Inspire show, we aim to use the least material while meeting strength and stiffness goals. It’s the base. Without it, other improvements don’t matter.
Swing weight is more complex. It’s about where the weight is placed. A light baseball bat can feel heavy if the weight is off. Topology optimization helps place material for the best feel.
Aerodynamics is all about physics. For helmets and bike frames, every extra surface is a drag. The goal is to let air pass easily, creating unique shapes.
Cost is also important. It talks to your dreams. A light, strong part is great, but it must be affordable. Generative design can make parts lighter and stronger, like GM’s seat bracket. But, if it’s too expensive, it’s not worth it.
Setting goals is like a debate. Each goal wants to be the priority. A designer wants strength, while a Formula One engineer cares about grams. You need to decide what’s most important. Knowing this is the first step in generative design. Only then can the real topology optimization start.
Constraints: loads, BCs, manufacturability rules
Load cases and boundary conditions are essential. They keep our AI’s creativity in check. They act as a physics-based reality check for every shape the software dreams up.
First, we must define the enemy. What forces will this part face? Is it the brutal, localized impact of a 200-pound linebacker’s tackle? Or perhaps the insane g-forces of a hockey slapshot, trying to twist a goalie blade into a pretzel? Maybe it’s the relentless, repetitive stress of a marathon stride—a seismic action repeated 26,000 times.
These aren’t just static loads. We must consider the inductive vibrations from actions like stomping or jumping. The aftershock matters as much as the quake. This is where finite element analysis (FEA) earns its keep. It translates these dramatic scenarios into cold, hard data on stress, strain, and displacement.
But forces are meaningless without context. That’s where Boundary Conditions (BCs) come in. Where is the part held? How is it fixed? Is that bike stem clamped at both ends, or does it pivot? BCs are the “how and where” of the physical world. They tell the FEA simulation what’s allowed to move and what must stay put.
Now for the ultimate buzzkill: manufacturability. This is the “you can’t actually build that” moment. An AI might design a stunning, internally latticed structure. But can your 3D printer reach those internal overhangs? Can a CNC machine mill that wild curvature without costing a fortune?
Manufacturing constraints often impact the final outcome more than the material choice itself. A genius design trapped in an impossible geometry is just digital art. We need parts we can actually produce. This means baking in rules for 3D printing compatibility, minimum wall thickness, and draft angles for molding from the very start.
Why this harsh focus on factory floors? Because a constraint isn’t a cage. It’s a filter. It separates the merely beautiful from the beautifully possible. By defining loads, BCs, and manufacturability upfront, we give the AI a focused playground. The result isn’t limited creativity—it’s directed genius.
The FEA-driven dialogue between “what it must withstand” and “how we can build it” is the core of modern design. It turns abstract optimization into a tangible, high-performance component. Forget magic wands. We have physics and pragmatism. And they are far more powerful.
Toolchain options (nTop, Altair, Autodesk, Ansys)
Think of your generative design toolchain as a heist crew. You need specialists, not just muscle, to pull off the perfect design coup. The wrong pick can lead to a messy job, while the right ensemble executes with precision. So, who’s in your lineup?
Let’s break down the contenders. Each platform has a distinct personality, a unique superpower. Your mission is to match that power to your project’s specific demands.
nTop is your explosives expert. It specializes in mind-bending, complex geometries that traditional CAD systems choke on. Think of it as digital witchcraft for your sports gear. It’s perfect for ultra-lightweight, organic internal architectures.
Altair Inspire is your biomimicry master. It excels at topology optimization, stripping away material like a sculptor. Need a goalie blade that’s stiff where it counts and feather-light elsewhere? Inspire’s solver is your artist. It often works in tandem with your existing CAD system.
The Autodesk suite, Fusion 360, is your agile, all-in-one infiltrator. It bundles generative design, simulation, and parametric CAD into a single, cloud-connected platform. It’s great for startups or teams wanting a streamlined workflow.
Then you have the enterprise-grade stalwarts. Ansys is the heavy lifter, the undisputed king of high-fidelity simulation. When your design absolutely must survive brutal, real-world physics, Ansys provides the confidence. Siemens’ NX and Dassault’s CATIA offer deeply integrated generative capabilities within their monumental parametric CAD environments.
So, how do you choose? It’s less about a “best” and more about a fit. Ask yourself:
- Is seamless parametric CAD flexibility non-negotiable? (Look to Siemens NX or PTC Creo).
- Is pushing the boundaries of geometric possibility the main goal? (nTop leads).
- Do you need rapid concept exploration with strong simulation? (Altair Inspire or Autodesk Fusion 360).
- Is certifying performance with bullet-proof analysis critical? (Ansys owns this throne).
The cloud-native hustlers offer speed and collaboration. The enterprise stalwarts offer depth and control. Your project’s “personality”—whether it’s a quick, innovative heist or a meticulously planned siege—determines the right tool. Don’t hire a scalpel to do a Swiss Army knife’s job, and vice versa.
Multi-objective optimization and Pareto interpretation
The real magic of generative design for sports isn’t finding a single perfect part. It’s about finding ‘good enough’ solutions where trade-offs are key. You’re balancing stiffness, weight, cost, and aerodynamics all at once.
Imagine it as a high-stakes barter system. Your budget is fixed, and you must choose the best properties from it. Want something stiff like the Tour de France? It’ll cost you in weight or dollars.
Generative design is all about finding a balance. It creates lighter, stronger, and more durable parts. The output is a range of options, each a compromise between different goals.
The Pareto front is like a stock ticker for design. It shows every ‘best possible’ compromise. Any design on this frontier is optimal, as improving one goal means worsening another.
Reading it is like negotiating. Is a 5% weight reduction worth a 15% cost increase? It depends on the product. The Pareto front makes these trade-offs clear.
Let’s say you’re designing a carbon fiber bike stem. You want high stiffness, low weight, and low cost. The software tries millions of shapes and shows you the best options.
The table below shows a snapshot of that frontier for our stem. Each row is a valid, optimal outcome from the generative design sports process. Your job is to pick your fighter.
| Design Strategy | Stiffness (Nm/deg) | Weight (grams) | Production Cost (Est.) |
|---|---|---|---|
| Ultra-Stiff Race | 120 | 145 | $85 |
| Balanced Performance | 115 | 128 | $72 |
| Lightweight Climber | 105 | 112 | $90 |
| Cost-Effective Endurance | 100 | 135 | $58 |
See the trade-off? The “Ultra-Stiff” option is a beast, but it’s heavy and pricey. The “Lightweight Climber” saves grams but sacrifices some stiffness and costs more to manufacture. There is no free lunch. The Pareto frontier is the menu.
This disciplined approach transforms subjective guesswork into a clear, data-driven conversation. It turns the art of compromise into a science. For engineers using generative design sports methodology, interpreting the Pareto front is the core skill. It’s how you convert software output into a winning gear strategy.
Mesh/voxel resolution and convergence checks
Mesh and voxel resolution are key in modern generative design. Get it right, and your topology optimization will shine. Get it wrong, and your design might fall apart.
Your design space is like digital clay. It’s made of tiny bricks called voxels or mesh elements. The size of these bricks affects your design’s quality.
Big bricks mean quick simulations but rough designs. Small bricks capture details but slow down your computer. Finding the perfect size is the challenge.
Convergence checks help you find the right balance. They ask if making the mesh finer changes the result. Start with a coarse mesh, then refine it and check again.
If the design changes a lot, your mesh was too rough. Keep refining until small changes don’t make a big difference. That’s when you know you’ve reached convergence.
The table below shows the trade-offs you face. It helps you find the perfect balance.
| Resolution Setting | Typical Element Size | Relative Compute Time | Result Fidelity | Best For |
|---|---|---|---|---|
| Coarse | > 5 mm | Minutes | Low (Blocky, conceptual) | Initial design exploration, very large assemblies |
| Medium | 2 – 5 mm | Hours | Moderate (Good for DFM review) | Most design iterations, cost/performance trade-off studies |
| Fine | 1 – 2 mm | Overnight | High (Accurate for prototyping) | Final design validation, critical load paths |
| Ultra-Fine | Days | Very High (Academic/Research) | Micro-feature analysis, publication-grade results |
Some projects fail because they aim too high. Computational limits are real. One team had to split their model into quarters due to hardware limits.
Your topology optimization workflow needs a clear plan. Start with a coarse mesh, then refine it in key areas. This approach saves time and sanity.
Mastering resolution and convergence is about finding the right balance. It ensures your design can work in the real world.
Material models: anisotropic laminates, foams, metals
The success of a prototype often depends on how well it models the material’s essence. Using “stuff” in generative AI is like giving a sculptor a block of unknown material. Will it behave like marble, crumble like chalk, or bend like rubber? The answer lies in the material model—the digital profile you give to the FEA engine.
Carbon fiber is like a high-maintenance diva. Its strength varies based on direction. Ask it to stretch along its fibers? Amazing. But ask it to take a load from the side? It fails miserably. This direction-dependent behavior, called anisotropy, is critical in the model. Get it wrong, and your bike frame might as well be made of wet spaghetti.
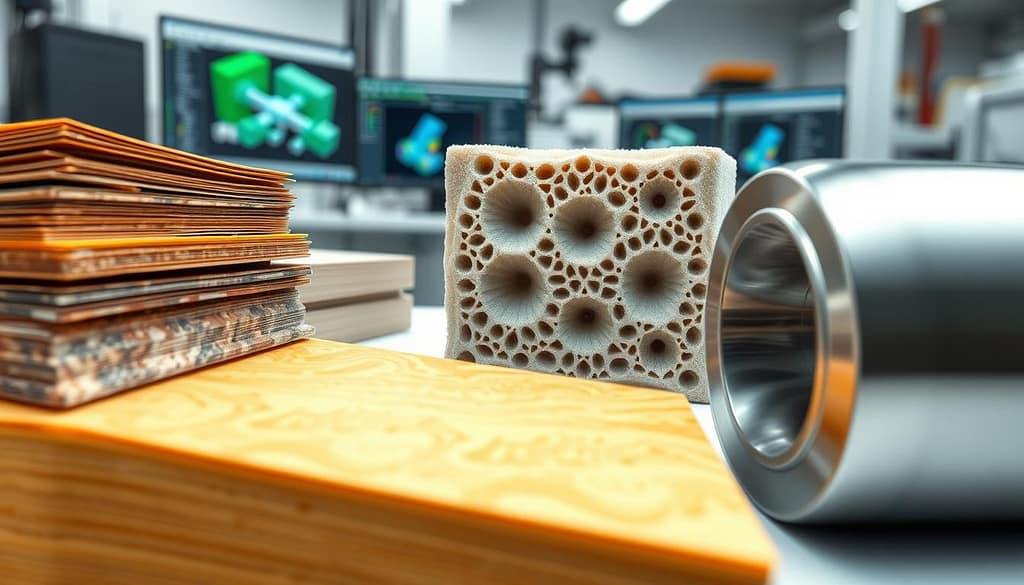
Metal and polymer foams are known for being crushably light. The FEA model must capture their unique crush behavior. It’s not just “light metal.” It’s a structured collapse. On the other hand, isotropic aluminum is reliable and predictable. Its model is simpler but just as important.
Why does this matter? The initial material you choose might not survive optimization. As one source notes, the chosen type “may not be what makes it to the final design depending on the material density or characteristics.” A generative algorithm might start with titanium, but if the FEA model correctly reports it’s too dense, the system will change. It needs accurate data to make smart decisions.
This is where materials science advancements meet digital twin fidelity. Your software’s material library must be more than a list of names. It must contain the mathematical soul of each substance. The table below breaks down the key characters in this drama.
| Material Class | Personality Quirk | Key FEA Model Input | Watch-Out |
|---|---|---|---|
| Anisotropic Laminate (e.g., Carbon Fiber) | Directional diva. Strong along fibers, weak in shear. | Ply orientation, stacking sequence, orthotropic elastic constants. | Assuming isotropic behavior will over-predict strength catastrophically. |
| Metal/Polymer Foam | Crushable lightweight. Designed to deform. | Compressive stress-strain curve with plateau, density, cell structure. | Modeling it as a solid linear elastic material ignores its energy-absorbing superpower. |
| Isotropic Metal (e.g., Aluminum 6061) | Predictable workhorse. Same in all directions. | Young’s Modulus, Poisson’s Ratio, Yield Strength, Density. | Missing work-hardening behavior can lead to non-conservative failure predictions. |
| General Rule | The fidelity of your FEA outcome is directly chained to the accuracy of the material model. A digital twin built on a lie is just a cartoon. | ||
When you set up your generative run, you’re not just selecting materials. You’re casting actors. You’re telling the FEA-driven algorithm, “Here is the carbon fiber’s script. Here is the foam’s motivation. Here is the aluminum’s reliable demeanor.” The software then directs them to perform under the loads and constraints you’ve set.
Getting this wrong is the classic mistake. It’s like assuming a ballet dancer and a sumo wrestler will move the same way because they’re both human. The model must know the difference. It must understand the diva’s directional tantrums and the foam’s gentle collapse. Only then can it generate a design that won’t fail in the physically unforgiving world. Your prototype’s integrity isn’t just about shape. It’s about substance.
Human-in-the-loop review and governance
The most critical phase in AI-driven design isn’t the algorithm’s runtime. It’s the moment a human engineer squints at the screen and says, “What in the world is that?” This is where governance begins.
Let’s kill the myth right now. The AI isn’t replacing you. It’s handing you a super-powered sketchpad. Your creativity sets the direction; the machine brute-forces the geometry. It’s augmentation, not automation.
Think of yourself as the creative director for a very fast, very literal alien artist. It will give you a bike stem that looks like a spinal column from a cyberpunk film. Aesthetically brilliant? Maybe. Moldable? Let’s discuss.
This is the human veto power in action. Your job is to guide the algorithm, interpret its often-alien suggestions, and apply irreplaceable judgment. This is the governance needed to bridge digital fantasy and physical reality.
There’s a steep learning curve here. It’s not about learning new software buttons. It’s about learning to speak the AI’s language. Your parametric CAD model becomes the rulebook. You set the dials—the constraints, the loads, the goals. The AI plays within those rules, but it needs a referee.
Effective review isn’t about saying “yes” or “no.” It’s a dialogue. You look at the AI’s proposal and ask the right questions. Can we machine this? Will it snap under a weird load case? Does it look like something an athlete would want to use?
The table below breaks down this collaborative review process. It shows where the AI excels and where human judgment is non-negotiable.
| Review Aspect | AI’s Strength | Human’s Judgment Call |
|---|---|---|
| Form Exploration | Generates thousands of topology-optimized shapes humans would never conceive. | Selects the option that balances performance with manufacturability and brand aesthetics. |
| Rule Compliance | Rigorously adheres to all defined physics constraints and boundary conditions. | Questions if the rules themselves are correct and updates the parametric CAD model. |
| Material Efficiency | Minimizes mass to the theoretical limit for a given safety factor. | Evaluates if the saved grams are worth the added complexity and cost in tooling. |
| Aesthetic & Ergonomics | Indifferent. A handlebar is just a load path. | Ensures the final part feels right in the hand and looks fast sitting on the shelf. |
This process turns a wild computational output into a viable product. You’re not just reviewing a design. You’re curating it. The AI provides the raw, genius-level “what if.” You provide the “yes, but.” That partnership is where truly innovative, yet practical, sports gear is born.
Rapid prototyping and correlation tests
We move from the virtual world to reality with a rapid prototype. Our AI’s blueprint is put to the test. In generative design sports, this is the ultimate test. The digital world was safe, but reality is different.
Before we start, we test with a digital twin. This lets us check if our design works without risk. It’s like a rehearsal for the real thing.
When the digital twin checks out, we make the design real. Additive manufacturing, or 3D printing, is key here. It handles complex designs easily, saving time and money.
The moment of truth is when you hold the part. You test it, and see if it matches the simulation. If not, it’s back to the drawing board.
But if it works, you’ve saved months of work. The path to production is clear.
| Prototyping Method | Speed | Relative Cost | Fidelity to Final Material | Best For This Phase |
|---|---|---|---|---|
| FDM 3D Printing | Very Fast (Hours) | Very Low | Low | Form, fit, and basic function checks |
| SLA/DLP 3D Printing | Fast (Hours-Day) | Low | Medium | High-detail aesthetic models and light functional tests |
| CNC Machining (e.g., Aluminium) | Medium (Days) | High | Very High | High-load validation when material properties are critical |
| Digital Twin Simulation | Instantaneous | Very Low (Compute Cost) | Perfect (Virtual) | Pre-physical correlation and infinite “what-if” scenarios |
The table shows a strategy, not just options. Start with the digital twin. Then, print a plastic version for a feel. For serious tests, use metal CNC’d parts.
This back-and-forth between digital and physical is key. It’s what makes generative design sports real. The prototype is a critical feedback tool. It shows if your algorithms get the real world.
DFM and cost modeling for scale-up
Scaling up from one to one hundred thousand units is a tough challenge. You’ve already optimized the design, making it lighter and stiffer. Now, the manufacturing team needs to see if it can be made.
Design for Manufacturability (DFM) and cost modeling help turn your design into a product. They make sure your creation can be made on a large scale.
The “Hard to Manufacture” challenge is a big deal. Your design might look like a bone or a tree root. But, most manufacturing processes prefer simpler shapes.
DFM is all about making your design easier to make. You might simplify shapes or add thickness where needed. It’s about finding the right balance.

Engineering meets economics here. Cost modeling helps decide if your design is worth making. It looks at material, machine time, and labor costs.
The goal is to keep your design’s essence while making it easier to produce. Companies like Rotor Bike Components have seen a 15% reduction in routine tasks and time to market. That’s a big win.
The table below shows the trade-offs when adapting your design for different manufacturing processes.
| Manufacturing Process | Key DFM Adjustment | Cost Impact | Performance Trade-off |
|---|---|---|---|
| Injection Molding | Add draft angles, uniform wall thickness, simplify undercuts | High initial tooling cost, but very low per-unit cost at scale | Potential added mass, reduced structural efficiency |
| Forging | Design for material flow, add generous fillets, limit complex cavities | Moderate tooling cost, excellent material strength utilization | Less fine detail possible, often requires secondary machining |
| Automated Composite Layup | Flatten complex curves, align fibers with load paths, minimize ply drops | High material and automation programming cost | May limit the most exotic, load-responsive shapes |
Integrating your design into existing workflows can be tough. You might need to split parts or change shapes. This is not failure, but refinement.
Cost modeling helps decide if these changes are worth it. It ensures every change is justified by the costs.
DFM and cost modeling are key to bringing your design to life. They help turn your topology optimization masterpiece into something real. The final design is a mix of innovation and practicality.
Case snapshots: bike stem, goalie blade, paddle face
Forget about abstract simulations. The real test of topology optimization is when it meets the real world. Let’s look at three pieces of gear that went from idea to prototype, thanks to AI-driven generative design.
Each story is a small part of the whole process. We see the problem, the hard rules, the digital magic, and the final result. This is where theory meets reality.
The bike stem’s job is simple: connect the handlebars to the fork without failing. It should also be light. Inspired by innovators like Rotor Bike Components, the goal was to make it as light as possible without losing strength.
The challenge was to make it stiff under a rider’s explosive power while keeping it light. The forces it faced were many: steering torque, braking loads, and road vibrations.
The AI’s solution was both organic and beautiful. It removed material from non-critical areas, leaving a strong, light structure. The result? A component that was lighter by nearly 20% without losing any stiffness. It’s like a cyclist losing fat while gaining muscle.
The Goalie Blade: A Triathlon of Demands
This is a complex beast. A hockey goalie blade must be strong, flexible, and light. It must withstand a 100 mph slapshot, resist twisting, and be fast for footwork.
The AI had to balance three competing goals:
- Impact Resistance: Material layout to absorb and disperse puck energy.
- Torsional Stiffness: Maintaining blade shape for precise rebound control.
- Minimal Mass: Every gram saved improves reaction time and endurance.
The design often uses a hybrid core. It has stiff carbon fiber lattices in high-stress zones and energy-absorbing foams elsewhere. This lets goalies play more aggressively, trusting their equipment to handle the punishment.
The Paddle Face: Slicing Through Air and Water
Whether it’s a kayak paddle or a pickleball racket, the face is key. The goals are to be stiff yet light and aerodynamic or hydrodynamic.
For a kayak paddle, the AI makes the blade rigid during the stroke and light on recovery. For a pickleball paddle, it creates a solid sweet spot without the weight of wood.
The magic is in the internal lattice. The software creates a structure that’s strong where it needs to be and light where it can be. This isn’t just about making it lighter; it’s about redistributing mass to improve performance. The result is a more responsive, less fatiguing tool that feels like an extension of the athlete’s intention.
These snapshots show the power of generative design. They move it from a promising idea to a winning strategy.
Validation plan and release criteria
The final act isn’t just a design review. It’s more like a courtroom. Your generative design stands before a jury of physics, safety compliance, and time-to-market constraints. This is where you formalize the validation plan—defining load cases, fatigue cycles, material testing protocols, and regulatory benchmarks before tooling investment begins.
For globally recognized engineering validation and quality management standards, consult frameworks published by International Organization for Standardization, particularly those related to product testing, risk management, and performance verification.
What are the pass/fail tests? Think about FEA stress limits under worst-case loads. Physical fatigue tests that mimic a season of abuse. Safety standards aren’t optional. Source 1 tells us safety is a must, needing multiple design scenarios.
Release criteria are your gates. They turn a digital twin’s promise, as noted in Source 3, into a shippable product. It’s about defining what “done” and “safe” mean before mass production.
Templates and checklist
Chaos needs a system. Here’s your battle plan. A starter checklist ensures your AI-driven design journey doesn’t end as a costly science project.
It tracks everything from the initial brief’s parameters to final quality assurance. Did you run convergence checks? Verify manufacturability rules? Update your parametric CAD model with the final lattice geometry? This checklist is the culmination of the entire journey.
Use it to audit each phase. It forces governance and documents decisions. It turns abstract optimization into a repeatable, high-performance product launch. Your parametric CAD system and this checklist are now the blueprint for what comes next.